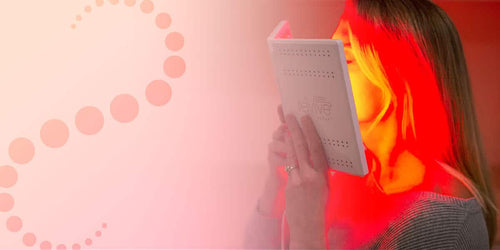
Red light therapy has moved well beyond the walls of medical spas and dermatology clinics. Today, a growing number of people are bringing panel-based LED treatments into their homes, drawn by the expanding body of research supporting its benefits for skin health and cellular regeneration. If you've recently added a red light therapy panel to your wellness routine, or you're seriously considering one, this guide is for you. We'll walk you through everything you need to know, from prepping your skin correctly to building a protocol that actually delivers results over time.
What Is a Red Light Therapy Panel, and How Does It Work?
A red light therapy panel is a large-format LED device designed to deliver targeted wavelengths of light across a broad surface area of the body or face. Unlike handheld devices or targeted wands, panels allow full coverage in a single session, making them especially well-suited for anti-aging, skin texture, and overall skin tone goals.
The science behind the technology is called photobiomodulation (PBM). It refers to the process by which the skin absorbs specific wavelengths of light, prompting cellular activity that supports repair, renewal, and collagen production.¹
Two wavelength ranges are most commonly used in at-home panels:
● Red light (620–700 nm): Visible red light that works at the skin surface and dermis level, primarily recognized for its role in skin rejuvenation and its ability to support the skin's natural repair processes.¹
● Near-infrared light (NIR, above 700 nm): Invisible to the naked eye but capable of traveling deeper into the body's tissue, reaching layers well below the skin's surface.²
Most quality panels allow you to use both wavelengths simultaneously, which is the approach most supported by current research.
How to Use a Red Light Therapy Panel: Step-by-Step
Step 1: Prep Your Skin
Start every session with clean, bare skin. Remove all makeup, moisturizers, serums, and SPF products before stepping in front of your panel. Sunscreen and thick creams create a physical barrier that can reduce light transmission into the skin, limiting how effectively the wavelengths reach their target tissue. A gentle cleanser is all you need. No special prep product is required.
Step 2: Set the Right Distance from the Panel
Distance matters more than most people realize. The closer you are to the panel, the higher the energy delivered to your skin per session. Here is a practical reference guide:
|
Goal |
Recommended Distance |
|
Targeted treatment, maximum intensity |
6 inches |
|
Full-body or large-area sessions |
12–18 inches |
|
General skin maintenance |
24–36 inches |
For facial sessions, 6 to 12 inches is a widely used range. For full-body use, 12 to 18 inches ensures good coverage without discomfort. Moving further away reduces energy delivery per square centimeter, so adjusting session duration accordingly is worthwhile.
Step 3: Protect Your Eyes
This step is non-negotiable. Even though red and near-infrared wavelengths carry no UV radiation, prolonged direct exposure to bright LED panels can cause eye strain or discomfort. Always wear the protective goggles that come with your device. Keep your eyes closed or shielded throughout the session.
Step 4: Choose Your Light Settings
Most red light therapy panels offer at least two modes: red light only, NIR only, or both combined. More advanced panels, like the reVive Light Therapy™ Lux dpl IIa, provide three distinct settings to address a wider range of skin concerns:
● Red + Infrared + Amber: A comprehensive anti-aging mode that targets fine lines, wrinkles, and overall skin tone while supporting deeper tissue renewal.
● Blue + Red: Designed specifically for acne-prone skin, combining blue light's clarifying properties with red light's skin-soothing benefits.
● Red + Infrared + Amber + Blue: The full-spectrum option that delivers the broadest range of wavelengths in a single session, ideal for addressing multiple skin goals simultaneously.
For general skin health and anti-aging, running red and near-infrared wavelengths simultaneously in each session is a well-supported approach. Research confirms that the combination is safe, non-invasive, and associated with high patient satisfaction and visible improvements in skin quality.³
Step 5: Start With Short Sessions
If you are new to red light therapy panels, build up gradually rather than starting with extended sessions. Begin with 5 minutes per treatment area and observe how your skin responds. After the first week, you can progress to 10 to 15 minutes per zone. A measured, progressive approach tends to deliver better long-term outcomes than jumping straight to maximum exposure times.
Step 6: Build a Consistent Routine
Consistency is the single most important variable in red light therapy. Occasional sessions produce minimal cumulative results. Aim for 3 to 5 sessions per week, sustained over several weeks. Research shows that red light supports collagen production in the skin's deeper layers, and these structural improvements develop gradually with repeated exposure.⁴ Regularity is what turns individual sessions into lasting, visible change.
How Long Should You Use a Red Light Therapy Panel?
For most skin-focused applications, sessions between 10 and 20 minutes per treatment area are appropriate. Beginners should start at the lower end (5 to 10 minutes) and increase gradually over the first two to three weeks. Once you have established your routine, 10 to 15 minutes per zone, 3 to 5 times per week, is a well-supported protocol for ongoing skin health. The biological response to light follows a dose-dependent curve, so more time per session does not simply equal more results.
Common Mistakes to Avoid
Even with the right device, a few habits can significantly limit your results:
● Skipping the skin prep: Starting a session with makeup or SPF on reduces how much light actually reaches your skin.
● Sitting too far away without adjusting session time: Moving further back without compensating means less total energy delivered per session.
● Progressing too quickly: Building up gradually over the first week or two sets the foundation for a sustainable routine.
● Skipping eye protection: Always wear goggles or keep your eyes covered, regardless of how brief the session.
● Inconsistency: Missing weeks at a time limits the cumulative progress you have built. Three focused sessions per week, maintained over months, will consistently outperform an intense short burst followed by a long gap.
The Science Behind the Results
A growing body of peer-reviewed research supports the use of red and near-infrared light for skin rejuvenation. A landmark controlled trial demonstrated that combined red and near-infrared sessions were safe, well-tolerated, and associated with measurable improvements in fine lines, skin roughness, and collagen density, with high overall patient satisfaction.³
At the brand level, reVive Light Therapy™ has its own documented results. In an in-house study conducted by LED Technologies, Inc., 97.4% of participants aged 39 to 66 noticed a visible improvement in wrinkles, fine lines, or overall skin tone after consistent use of red light therapy.
Built on nearly 20 years of R&D by LED Technologies, Inc., the reVive Light Therapy™ devices are engineered to deliver these wavelengths with the precision and reliability that translate research-backed protocols into real, at-home results.
Frequently Asked Questions
How many times a week should I use a red light therapy panel?
For most skin health goals, 3 to 5 sessions per week is the recommended frequency. Results from red light therapy are cumulative, meaning they build progressively with consistent exposure over weeks. Starting at 3 sessions per week is a practical and sustainable approach for most people.
Can I use red light therapy every day?
Daily use is generally considered safe for most people, provided sessions are kept within a reasonable duration (10 to 15 minutes per area). That said, results do not require daily sessions, and 3 to 5 times per week is sufficient for steady progress. Consistency over time matters far more than daily frequency.
How long before I see results from a red light therapy panel?
Most consistent users begin to notice visible changes in skin texture and tone within 4 to 6 weeks of regular use. Collagen-related improvements, such as reduced fine lines, tend to develop more gradually and may become more noticeable after 8 to 12 weeks of sustained sessions.
Explore the full reVive Light Therapy™ Lux Collection to find the panel that fits your skincare goals.
Shop the Lux Collection | Explore Red Light Therapy Devices
Scientific References
¹ Couturaud V, et al. "Reverse skin aging signs by red light photobiomodulation." Skin Research and Technology, 29, 2023. https://doi.org/10.1111/srt.13391
² Avci P, et al. "Low-level laser (light) therapy (LLLT) in skin: stimulating, healing, restoring." Seminars in Cutaneous Medicine and Surgery, 32(1), 2013. https://pubmed.ncbi.nlm.nih.gov/24049929/
³ Wunsch A, Matuschka K. "A Controlled Trial to Determine the Efficacy of Red and Near-Infrared Light Treatment in Patient Satisfaction, Reduction of Fine Lines, Wrinkles, Skin Roughness, and Intradermal Collagen Density Increase." Photomedicine and Laser Surgery, 32(2), 2014. https://pubmed.ncbi.nlm.nih.gov/24286286/
⁴ Chang H, Shen Q, Tan Y, et al. "Red light promotes dermis-epidermis remodeling via TGFβ and AKT-mediated collagen dynamics in naturally aging mice." Zoological Research, 46(5), 2025. https://pubmed.ncbi.nlm.nih.gov/40808593/